Live Twitter Feed
Blog Index

Entries in roarockit (22)

Monday
Jul232012

Wakeskate Build & Review Pt.1

**The following post was written by a talented builder named Matthew Richardson, who runs a company called 'Frenique Customs' out of Pickering, ON.

“We're Fresh and Unique”

If you have made a longboard, you can make a wakeskate! How awesome is that!! 

For me, it was pretty rad to start making my own longboards, and a wakeskate is basically the same thing, only difference is that it's used on water.  

Here is some history of how I learned about wakeskating - I personally spend almost every weekend at my cottage. We have a boat and I started wakeboarding 4 years ago. A friend of mine bought a wakeskate, which is basically the same thing as a wakeboard but without bindings and you usually ride it with grip tape and an old pair of skate shoes. A lot of people look at you when you’re telling them about the sport and think that it's crazy... "your going to fall all the time!".  Yes, I may fall a lot... BUT, you’re on water dude. That doesn’t hurt like pavement. GIVE IT A TRY!!!!

The Roarockit Skateboard Company gave me the ability to use their method and products to make a solid longboard. I have made prototypes from this process, and it has led me to meet some really cool people, and some rad kids with tons of potential. I had the urge to make my own wakeskate and see how riding my own creation on the water would feel... would it work? Who knows until YOU try.
Roarockit started selling a wider veneer (24" x 48") and wider bag earlier this year, so it gave me the perfect chance to try and build my own wakeskate.  I placed an order and Chris 'Burns' Bennett (Manager of Roarockit) was nice enough to drive it to my house personally (I live on his route home luckily enough).   I met with Chris and chatted for roughly an hour as he delivered my order of 10 double-wide  sheets of Canadian Maple veneer and my 36" x 52" TAP Bag. I was going to try a 4 ply board and a 6 ply board... this review is for the 4 ply board.  

I went with a triple stage rocker, with 1.5” in total height. I wanted a large surface to ride on top of the water so I went with a 16” wide board and 41” in length. I wanted to have the sides symmetrical and the corners to be cut, but with a rounded profile to allow easier spinning and smoother cutting side to side. I own a roll of Jessup Grip tape, so I used 2 - 9” wide pieces to cover the majority of the board. 

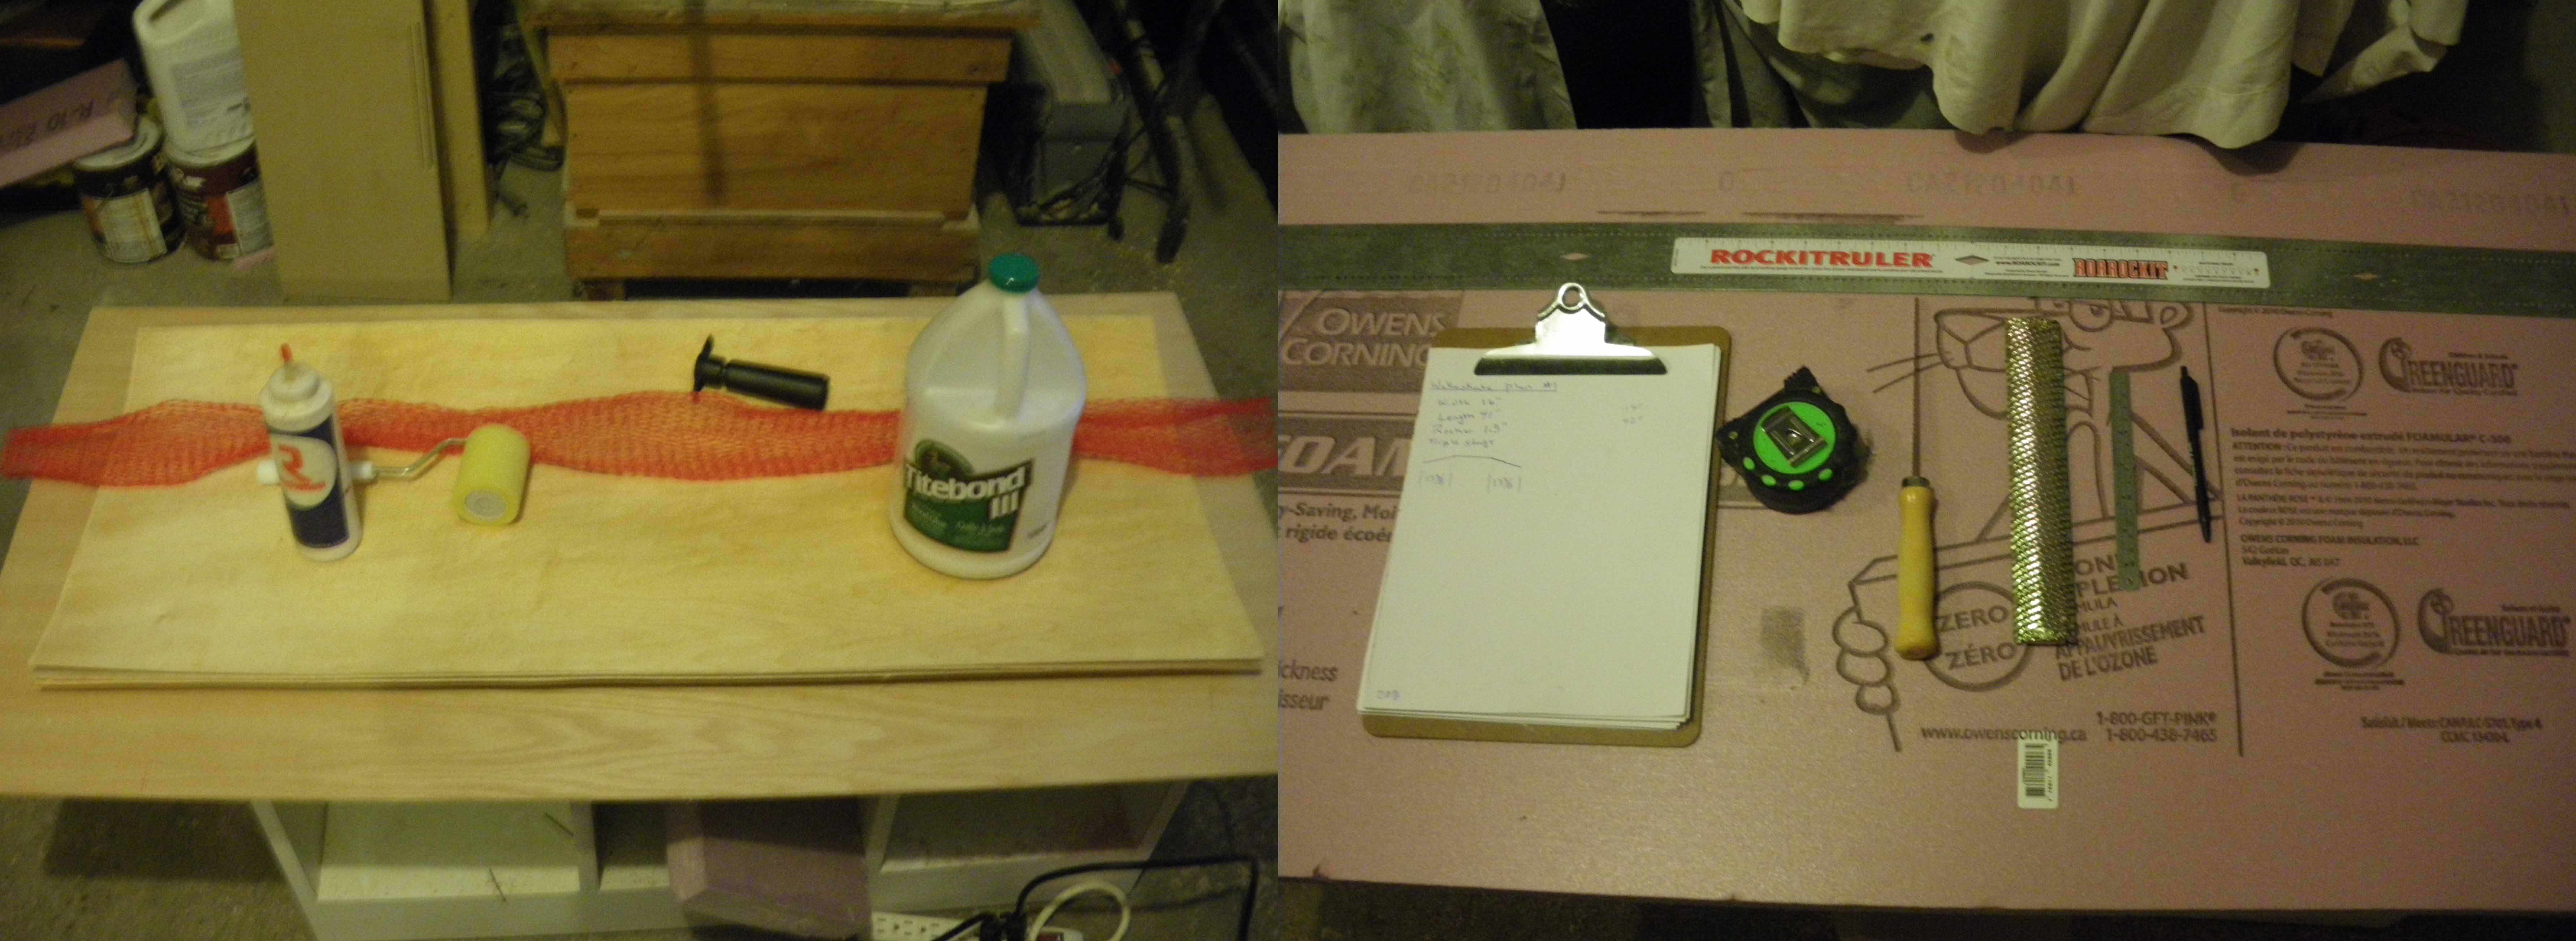
The veneers are the same Maple used in my longboards, so working with the wood and how the mold works is the same process, just a little larger than normal.  I used the same type of foam, which is the Pink rigid insulation that is 2” thick - I find it carves nice, and somewhat quick, by using a bondo rasp and then sanding to smooth out the rough cut foam. Once you draw out your wakeskate design, it is just about having a good eye, some patience and determination.  With my mold I had a lot of foam to carve compared to all my longboard designs, so it took more than double the time. I could have used a knife, but I find it to be inaccurate and prefer to use my rasp.   I added a ½” around my board mold, so I have as little as possible excess of the sides and front.  I had to cut the width of my veneer to size using my table saw, and I cut it to length using an exacto blade.   My mold and veneers are now ready to be pressed into the raddest wakeskate I have ever made!
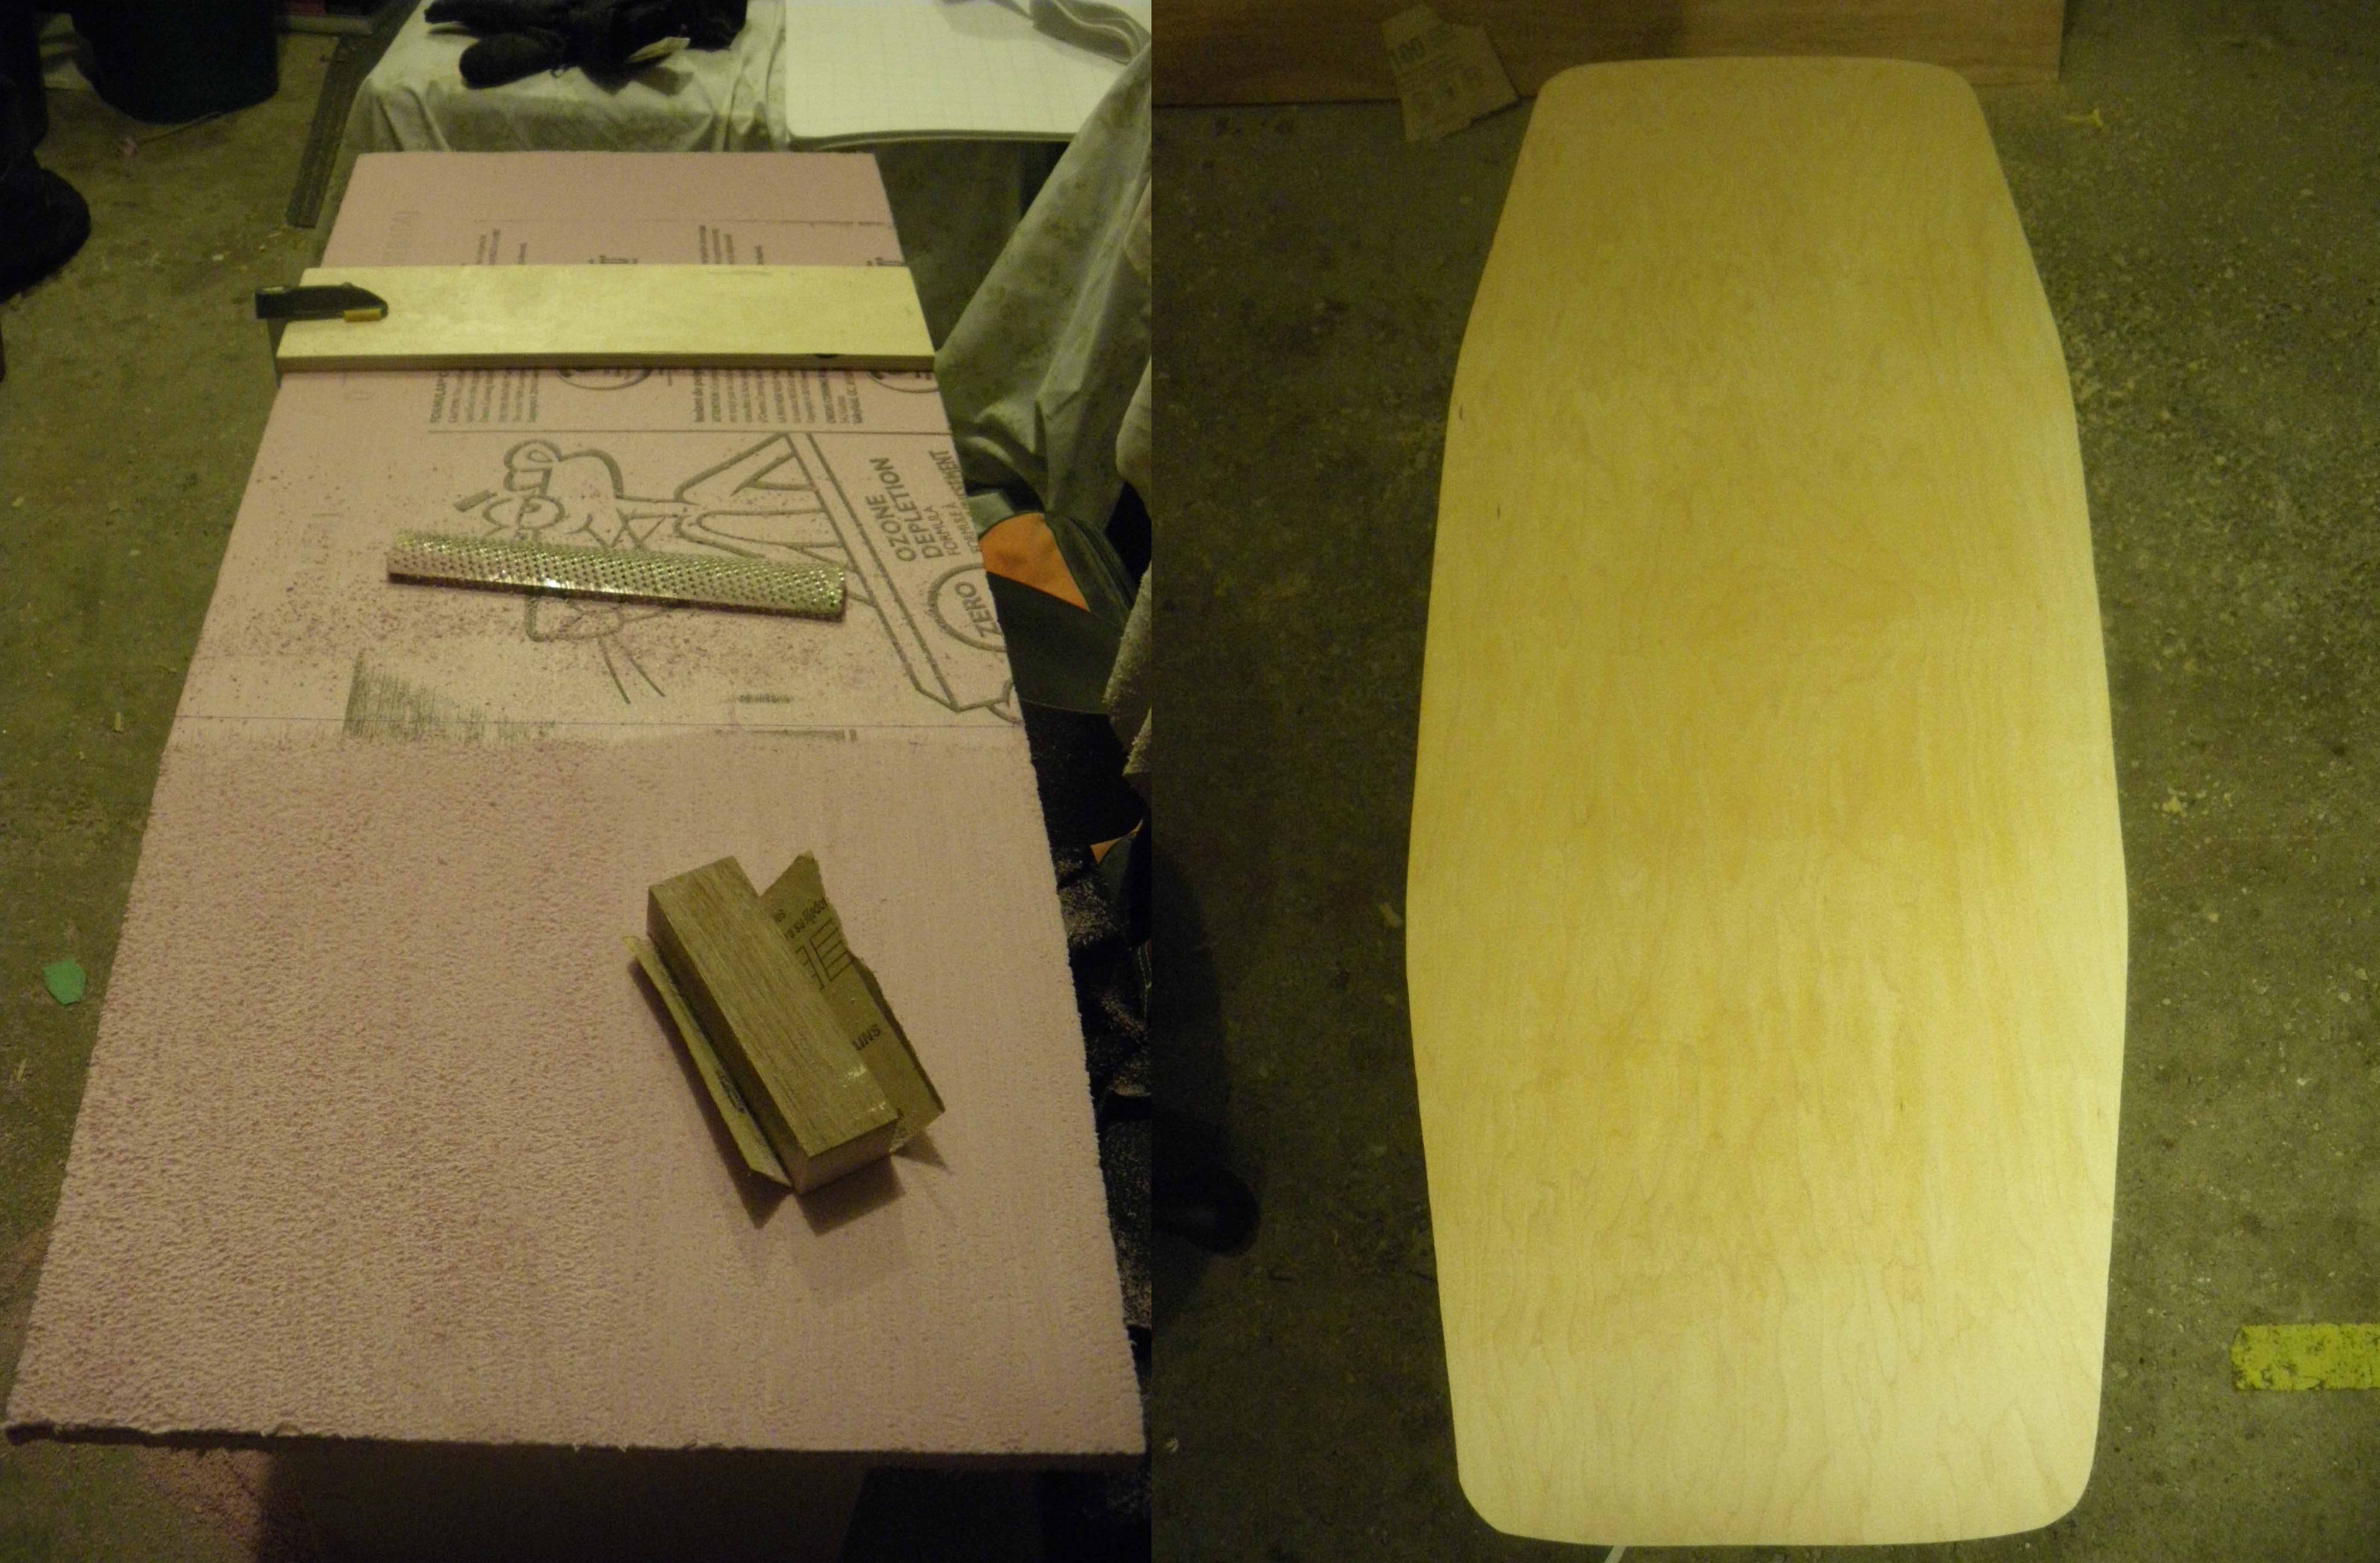
This being a new mold, I wanted to do a dry fit (without glue) to make sure all my veneers would press evenly and there would be no gaps between the wood and my mold.  My first dry fit went great, there were no gaps and the top layer was nice and smooth.   Now that I know this mold works... its time for glue.  I used the waterproof and inexpensive Titebond 3 glue.  I am also going to epoxy the entire thing after I cut and sand it, so that the board will seal properly and last longer.  

I got the board in the bag, I made sure to check the bag frequently and then let it sit over night till I got home from work and checked it out.

It totaly worked, how crazy!!!  

I removed the newly pressed baby... I mean board, from the bag and checked out all its edges.  I was able to get a nice lamination from this pressing, which got me even more stoked to ride it.  I got right to laying out my design!  I don’t like using a template, I use measurements and tools to draw it out, especially because it was my first wakeskate.  I started with my center lines and then measured everything off of those lines.  I used a measuring tape, a small ruler, my Rockitruler, and something for drawing circles.  After making my lines, I used a jig saw to cut the board out roughly to shape. I made sure to cut a little outside of the line so I can sand the edges.   Through all of this, I went slow and steady making sure I did not mess up.  Keeping a good line could make all the difference and how the board rides on water.  

All said and done, the board was cut, sanded and I just coated the whole thing with epoxy.  Next step, throw on some grip tape and hop in the lake!!!


**Check back soon for the stoke-inspiring conclusion of the 'Frenique' Wakeskate Review! 


Wednesday
Jun272012

Hana Builds! in Maui

Ma Ka Hana Ka ‘Ike

They work, they learn… to build stuff. Like their own skateboard park.

And their own skateboards!

Students doing the cement work at the park and in their shop building lots of boards

On the island of Maui, the local park in the remote town of Hana was really only used as a late-­night hang-­out. But since the skate park was completed, it is filled daily with skaters, many riding their own handmade Roarockit boards! Families and friends are spread out on the grass, picnicking and enjoying the scene.

Under the leadership of founders Rick Rutiz and his wife Kirsten, high school and graduate students do hands-­on building projects as part of the Ma Ka Hana Ka ‘Ike Building Program. They’ve done many ambitious builds such as a shelter for their school buses, a thrift shop for the Home Dialysis group, cottages for their local kapuna (elders), a solar‐powered home for a family who’s house burned down and have even outfitted their work truck with solar panels to provide power for on-­the-­job energy.

The Roarockit truck parked by the student-built bamboo framed wood storage and office building

Ted enjoying the community built skatepark in Hana

When the skate park was nearly completed, Rick contacted us at Roarockit to bring in our technology to his classes. He wanted the boards they built to be of the best quality to match the level of skating now possible at the park. He offered a summer program to the local school and the response was overwhelming! In this very small community, over 100 students signed up literally overnight, to build boards! 

Ted and I went on location to visit the build sessions and to meet Rick and especially his 3 graduate students who lead the skateboard build sessions. Russell, James and Lyman are skaters themselves and are the shop foremen in the workshop and on the jobsites. In a few short weeks these friendly, smart, inventive and very cool dudes had figured out how to use the Roarockit Thin Air Press technology, taught more than 80 young builders in class then taken it further by modifying and creating new molds for their own custom designed boards. Awesome!

Ted with Russell, James and Lyman, discussing advanced Roarockit build techniques

The kids with their custom built and painted Street Decks!

The town of Hana is a community that helps each other in true Hawaiian spirit. We were awed and amazed by the experience of being there. The scenery is breathtaking and the community is supportive of each other, what a wonderful place and a great way to live!

Aloha,

Norah

To see other projects built by these Ma Ka Hana Ka 'Ike students, visit hanabuild.org

Friday
Jun082012

Brand New BIRCH Veneers Pt.3

Conclusion

From a board builder and riders perspective, we are quite pleased with the results of the 1/16” Solid Birch veneers. We found them very easy to work with, and the results were a nice contrast to our standard Maple veneers. Both are very strong/durable, and access to both now allows builders to further customize their rides. There is also the possibility of combining both materials on the same board to help create a unique weight and flex. The fact that Roarockit offers both at the same price allows builders to mix and match material with ease (contact us directly to order your own customized mix of veneers) .

Compared to other common board building materials on the market, our Birch veneers compare nicely to the popular bamboo/foam core alternatives. Especially for 'dancers' and boards meant to have a substantial amount of flex.

The durable, flexible and lightweight properties of the Birch are what lead us to making the Bamboo comparison in particular. It is also worth noting - for our North American builders who import bamboo from overseas, the fact that we have found a local source for our Birch veneers, helps reduce our carbon footprint and keeps cost down for everyone.

Through our research and testing, we concluded that the 1/16” Solid Birch was the most dynamic new material that wasn't readily available to board builders. It is no secret that the Birch Plywood found in most local lumber and hardware stores is not an ideal building material for skateboards. However, we chose to test this material because it is often used by beginners due to it's widespread availability.

Roarockit welcomes anyone who has tried our new Solid Birch veneers to send us their feedback and experiences working with the material. Also, if anyone feels like further breaking down the science behind some of our findings, any and all data or suggestions would be greatly appreciated... We may look great in our lab coats – but in reality, are much better skaters/woodworkers than we are scientists!

We would like to thank you all for your continued support of the Roarockit Skateboard Company. It brings us great joy when we see our hard work and dedication to classrooms/independent builders, pay off with positive comments and success stories from around the world.

Happy building!


Tuesday
Mar202012

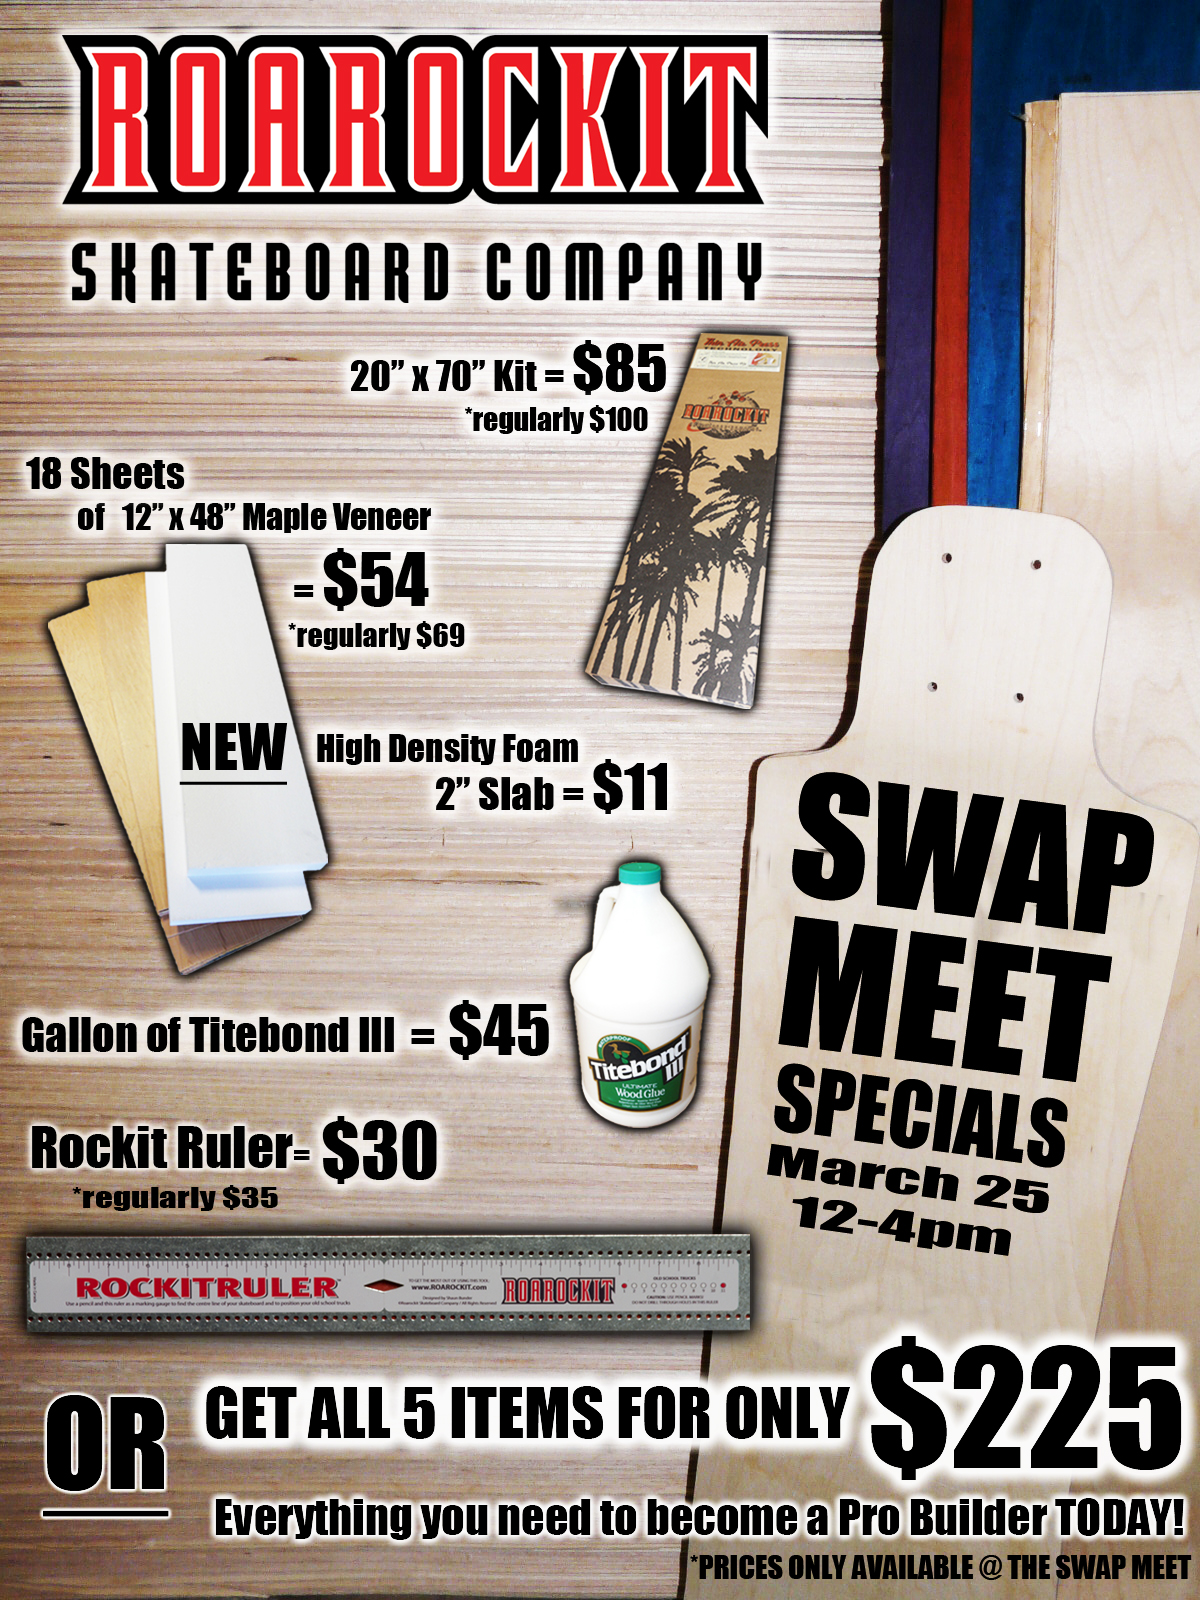
Swap Meet SPECIALS!

The Roarockit Skateboard Company is again hosting this years Annual Swap Meet. Not only does the Swap Meet mark the unofficial launch of the new skate season, but it also the time when local board builders start planning for the Summer ahead.  We will be offering some great deals for this special day, and as always FREE BBQ!! 

The theme of this years special is "Become a Pro Builder Today!"

What we are offering is a chance to walk away with EVERYthing you need to start building your own custom skate/longboard decks, including a few brand new products we are very proud of - such as our brand new High Density Foam and the innovative Rockit Ruler!

You can get great deals on almost all of our every day products, including Titebond III glue, 1/16" maple veneers and 20"x70" TAP bags - but most exciting is the fact that you can walk away with ALL of these products for the low package price of $225!! That's over $40 in savings.

The total package includes:

1-   20"x70" TAP Kit (our most popular vacuum bag)

18- Sheets of 12"x48" maple veneer (enough for two, 9 layer decks)

1-   2" Slab of High Density Foam (used to make your own custom mold)

1-   Gallon bottle of Titebond III glue (best glue for building boards)

1- Rockit Ruler (used for marking centerline and aligning truck holes)


Items will also be available individually, but this is a ONE DAY ONLY promotion.


We look forward to seeing everyone out again this year, and hopefully a few new faces as well!

The Swap Meet will be located at Roarockit's Teaching Facility located at 880 Millwood Rd. Toronto ON M4G 1X1 on Sunday March 25th from 12pm-4pm


Wednesday
Feb222012

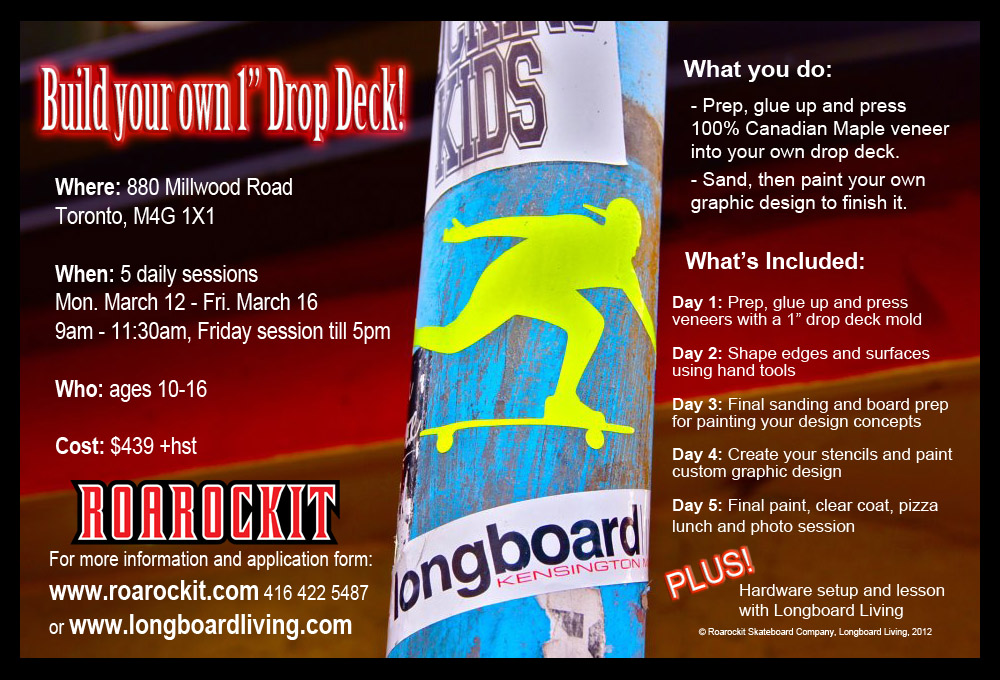
March Break - Drop Deck Class

Roarockit Skateboard Company in partnership w/ Longboard Living are proud to present our brand new March Break Drop Deck Build!!  

We have developed the FIRST EVER, clampless and precut - 1" drop deck build! 

Over the course of 5 days you will be taken through the step-by-step process of laying out, pressing and decorating your very own Drop Deck Longboard. This special class will first take place during the Ontario school semesters March Break, and is limited to 10 students aged 10-16.  

Not only will you walk away with your own hand-built and custom decorated 1" Drop Deck. But you will also receive all the hardware needed to setup your new ride (including wheels, trucks, bearings, grip and hardware), a helmet, t-shirt and a celebratory pizza lunch on the last day!!  

The cost of the course is $439 + hst, and will take place at Roarockit's Professional Board Building School located @

880 Millwood Rd. Toronto, ON - M4G 1X1


It will run from:

Monday, March 12 - Thursday, March 15 from 9:00am - 11:30am

with the final class taking place:

Friday, March 16th from 9am-5pm


But wait, there's MORE!

You will also receive a lesson on how to setup your new board, and tips on riding a drop deck from a Longboard Living representative.

We are extremely excited to offer this brand new class, and it is sure to be a great time!  If you are interested in signing up you can download our Sign Up Sheet located at the link below.  Fill it out and either email or fax it back to us to reserve your spot.  

Entry is based on a First Come (and PAID) First Served basis.


March Break 1" Drop Deck Build - Sign Up Sheet HERE


EMAIL Forms - chris@roarockit.com

FAX Forms - 416 422 1172

Feel free to phone or email us with any questions regarding the classes

1-416-422-5487

Toll Free 1-888-857-7790